

An app update is coming soon, bringing new amazingly flexible random modes for robot drills. To make this possible, I had to fundamentally change the application “under the hood”, but it was worth it. Now it will be possible to save and restore all random settings (many users asked about this possibility) and make it very flexible to customize random drills.
I will tell you about all this immediately after the release of the new version. The new version is still being tested, but for now I want to acquaint you with one more function. At first glance, it looks insignificant, but in fact it is very important both for the usability of the robot and for the future development of the project as a whole. It is ….
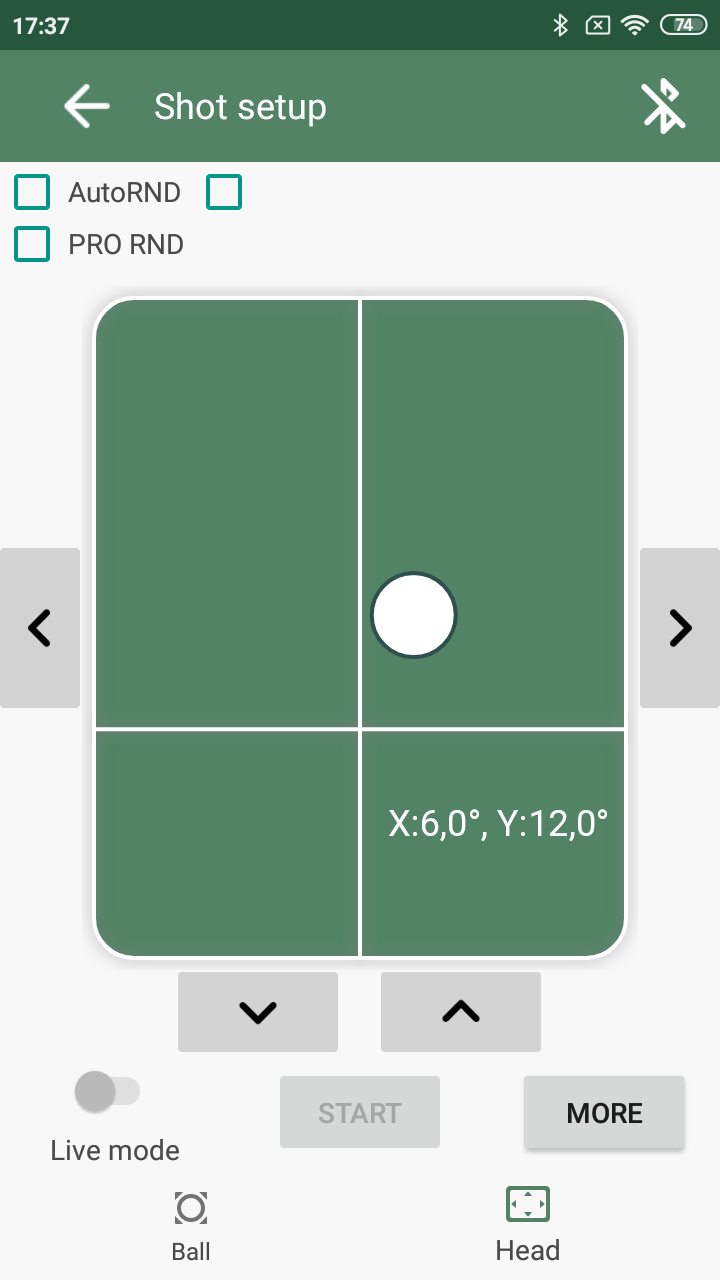
Setting the head rotation angle in degrees
How many times have you had to slightly move the head to fine tune a shot? You roughly aim the head, take a sample shot and see the result. It took several tries, and although over time an intuitive understanding of where to point the head comes, it still takes some time. The only inconvenience was that the application did not tell you at what angle the head was turned.
In the new version of the application, the head rotation angles are set in real units of measurement – degrees
Our tests show that the result is accurate enough, which means it can be used. For example, you can very quickly make a “mirror” shot, i.e. move the shot from left to right and vice versa. Or quickly and accurately set the desired direction of the shot with fewer attempts – once you know the required angle, you can easily set it again.
However, not all is so simple. To create this functionality, I had to do a huge amount of work before everything worked as expected. However, not everything will work for you right away, but ONLY after you complete the procedure of Head Calibration. Moreover, this procedure is absolutely essential before you start saving shots and drills with the new application. By the way, the old saved shots / programs will not appear until the calibration is done (they have not disappeared anywhere, the app is just waiting for the calibration to be completed). So, …
Head Сalibration
If you have already imagined how, armed with a bunch of measuring equipment and smart books, you are conjuring over a robot – you can relax, you don’t have to do all this stuff 🙂 For your convenience, the application will offer to use a wizard which will guide you through all stages of the procedure.
What do you have to do? Nothing special, you just need to tell the robot at what settings its head is in the middle position, as well as the maximum permissible ranges of head rotation “left / right” and “down / up”. The app will calculate the rest automatically and convert your saved shots / drills into a new format.
For clarity, I made a video that demonstrates the entire calibration process (for convenience, turn on subtitles):
The algorithm of actions is as follows:
- It is necessary to set the head in such a position in which it looks directly straight ahead, i.e. there is no tilt up, down, left or right. To do this, use the buttons for smooth movement of the head on the sides of the green field. Then press the “Next” button
- You probably noticed that, after the first stage, the head turned to the maximum possible left position. At this stage, we must find such a value for the settings at which the head will just start moving away from the maximum possible left position. Smoothly move the slider – at first, the head will hardly react to changes and will remain in place. But as soon as you see that the head begins to deviate to the right, return the slider back a little and press the “Next” button. In the video, at this stage, I completed the setting with a value of 1070 (you will get another value, this is normal)
- Now the head has turned to the maximum possible right position. Similar to point “2”, find the settings at which the head will begin to move away from the maximum possible right position. In my case, this value was 2500 (see video). Press the button “Next” again
- Now the head has turned to the maximum possible bottom position. Similar to point “2”, find the settings at which the head will begin to move away from the maximum possible bottom position. In my case, this value was 2500 (see the video). Press the button “Next” again
- Now the head has turned to the maximum possible top position. Similar to point “2”, find the settings at which the head will begin to move away from the maximum possible top position. In my case, this value was 830 (see video). Press the button “Next” again
- At this stage, the application will calculate the obtained head rotation angles and convert all your previously saved shots into a new format – you can see them again in the list of shots / drills on your phone. Calibration completed.
That’s all. I wanted to tell you about this in advance so that you are “armed” with the knowledge after installing the new version. I think that testing will be completed very soon, and you will be able to evaluate all the new features yourself. I promise you will love them!